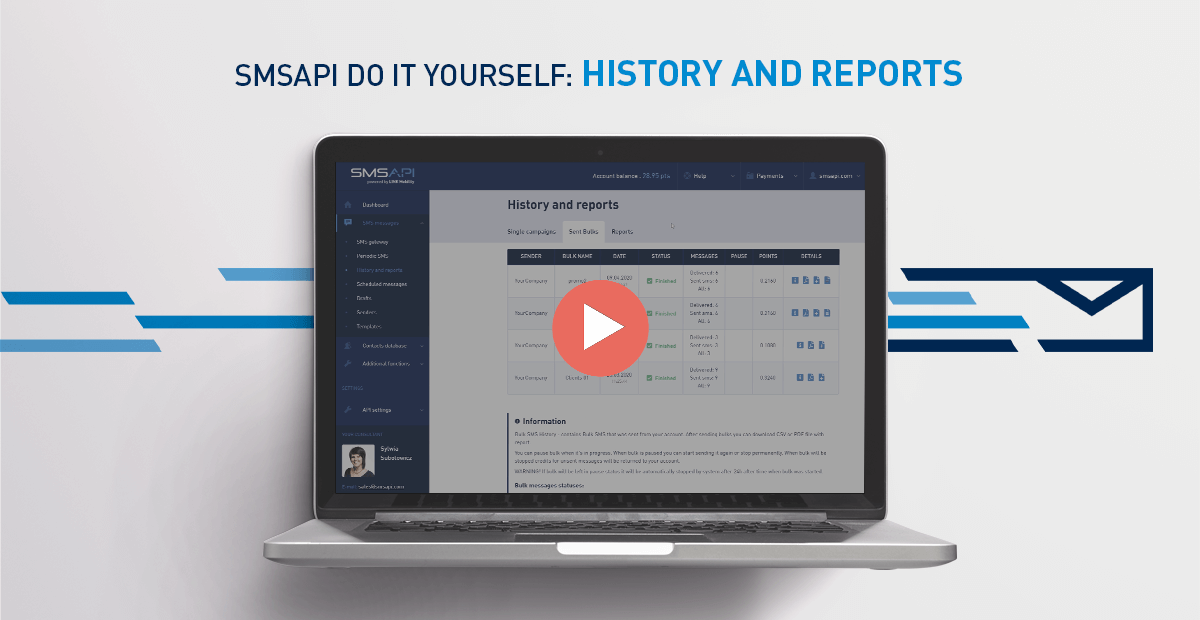
Welcome to the next episode of the SMSAPI Do it yourself Guide series. In this part, you will learn how to generate reports from SMS campaigns and view history in the SMSAPI Customer Portal.
See how easy it is to view history and generate reports in the SMSAPI Customer Portal
View account history
To see the history of the account’s activity, go to the SMS messages menu. The single campaign table contains messages sent in the last 24 hours or four days if the message doesn’t have a delivery report.
The history can be filtered by the sender’s name and the recipient’s number. You can check the following information:
- used SMS sender name,
- recipient’s number,
- date and time,
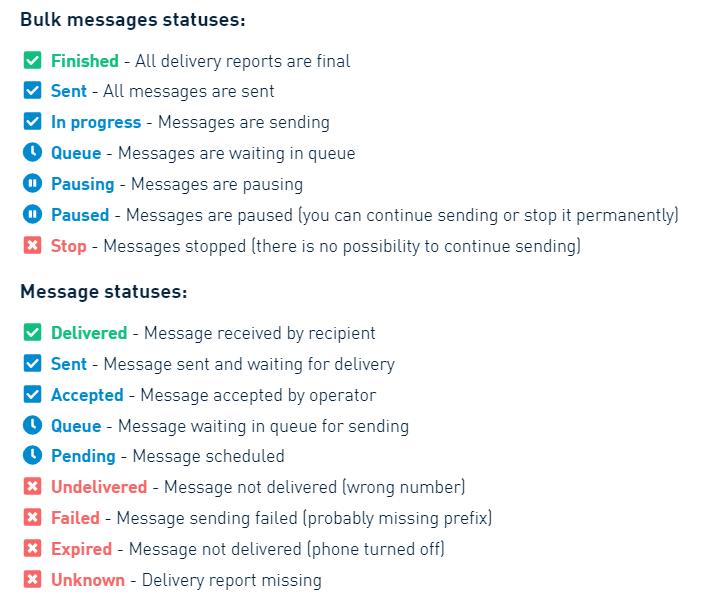
- status (more on statuses below),
- number of parts of the message,
- information if the message was sent via API or the Customer Portal,
- points spent,
- other details (hover over the “i” icon to display message’s id, login of the sender and content).
Message statuses
All message statuses are explained in the “Information” section at the bottom of the page.

The history of bulk SMS contains messages sent from the Customer Portal to more than one recipient. The table contains the same information as the history of a single campaign, except that after sending, you can download the message delivery report in PDF in the form of a summary or CSV with detailed information.
How to pause ongoing SMS campaign?
You can pause your ongoing SMS campaigns in the SMSAPI Customer Portal. Press “Pause” button in the History and Reports tab.
Paused campaign may be resumed or stopped completely. In this case, a refund will be made for all unsent messages.
Generate an SMS campaign report
In the Reports tab, it is possible to generate summaries based on any settings: reporting method (from a selected period or periodically generated), date range (last month, week, a year or selected range from – to) and report type (detailed, short or bulks).
A detailed report means a list of individual messages sent in a selected period, a short report is a list with the number of messages sent on individual days, and the bulk report concerns only bulk campaigns. Here you should also indicate if the report should include bulks and whether it should contain the content of the message.
Additional settings include the following options:
- sending the report to one or more e-mail addresses;
- giving it a name;
- attaching the IDX parameter, which is an optional user parameter;
- attaching data from the database of numbers;
- adding information from the cut.li short link.
After configuring the settings, click “generate” and download the report or find it in the list below. It is worth remembering that if you generate a report with a very large amount of data, it will be added to the queue and then generated by the system. It will be available for download on the list of generated reports or will be sent to the e-mail address if the “Send report to e-mail” option is set.
Next step: Shortened Links cut.li


